
Here is how it is done. I will use another pattern, Venice Rose, as the model for step-by-step instructions. (Note: I am only describing how to create the "spokes" of the rose.)

The "paper" used in paper piecing is really a lightweight stabilizer. I like "Tear Easy" by Sulky. It is pretty translucent and really does tear easily. Do NOT buy any kind which is "fusible". The pattern is traced onto this paper. A single object (like an elephant) may require several pieced sections, which are then joined to make the final object. After the pattern is traced, small scraps of fabric are cut and sewed on sequentially. Some objects may require you to sew from the middle outwards, others from one side to the other.
The strange thing about paper piecing is that you are working on the back of the pattern! And also upside-down! WAIT!!! Don't leave. It's not as difficult as it sounds. But one key thing to remember is that your finished object will be the mirror image of the pattern piece. This is irrelevant when making letters such as "o" or "x", where the reversed image is identical. But if, say, you want your elephant facing left, the paper piecing pattern will have it facing right. Trust me, it will all work out in the end.
Let's see how this works:
First you will have some sort of pattern to trace, whether from a book, a specific pattern, or of your own design. Here is the beginning pattern for the Rose:

I had to cut this pattern in half to have a "left" and "right" side for the actual paper piecing.
Then you will trace the pattern onto the stabilizer paper. To do so, I put double stick tape on the pattern (you don't want the stabilizer to move around while you are tracing). When you are done tracing it is easy to peel away the stabilizer (the tape stays stuck to the pattern). I also use a mecahnical pencil. This gives a good, consistent thin line (and no sharpening!). Also, VERY IMPORTANT: some patterns may NOT include the seam allowance. Every traced piece MUST have a 1/4" seam allowance around the outside edges. If your pattern does not include the s.a., you must add it yourself. And here is a special trick: I always put hash marks on the seam allowance lines. You will see why this is important later.


The first photo above shows the stabilizer on the pattern (note the s.a. hash marks); in the second it has been peeled off.
Most patterns will also have each mini-piece labeled (with a number or letter), so it is easier to identify the order that they are sewed. You will not always sew a piece to the previous piece. There may also be subsections that are joined to make the final object. Here is an example from "A Quilter's Ark", by Margaret Rolfe that illustrates what I am saying (this is the lion pattern as seen in the quilt at the top of this post):

Notice how piece 6 in section A is added to the 1-2-4 assembly. This page also clearly shows how the final pieced object is reversed. Note that the lion's head in the pattern is on the right, but in the finished piece, it is on the left. Of course, if you were using this pattern and, for some reason, wanted the lion to be facing right, you would have to flip the traced image before you started sewing the pieces on.
Next, you start cutting and sewing the pieces of fabric. Remember: you are looking at the back of the pattern, but the fabric will be on the front. You should always be looking at the side of the stabilizer with the pencil lines.
OK, so cut out the first piece. How big? Just wing it! That's part of the FUN of paper piecing. No measuring, no templates....just cut each piece big enough to cover the appropriate area without wasting too much. Don't be stingy, but don't be wasteful (bonus: if you do cut a piece too big, when you trim it you may be able to use it for a subsequent smaller piece calling for the same fabric!).
The first piece of fabric is placed right-side down; all others will be right-side up. This is critical. You don't want to finish sewing 20 tiny pieces and then find that the third one is wrong-side out!
Pin the first piece in place anywhere in the marked area (#1 or A or however it is indicated). Now cut the second piece. Then, this is where it gets a little tricky. The second piece is placed right-side up, and at least 1/4" past the seam line to be sewn. You have to kind of lift the stabilizer and slide the fabric into place. It might be easier to understand from these photos:


From the above photo, you can intuit that the edge of piece 2 (the orange dots) extends 1/4" past the seam line.
Next trick: I then pin piece 2 in place by putting the pin across the seam line to be sewn. This does two things: holds the fabric in place and gives a visual check on which line to sew next (believe me, it is really easy to sew on the wrong line!). Also, if you were to flip the whole thing over at this point, you would want to be sure that the pin is going through piece 2 (or whichever piece you're doing) in the right place. Huh? Well, you may have placed the piece going the wrong way across the seam line (been there, done that). If this happens, and you sew and trim it, you will be left with a little strip of fabric; not the coverage you wanted. The other reason to check the pin is to make sure that you left anough fabric across the seam line to be sewn. If the pin is right on the edge, then take it out and readjust the fabric piece.
Now, sew right on the pencilled line. This is not your normal 1/4" seam. Sew on the line! Use small stitches; they make it easier to tear the paper off later. (Downside: smaller stitches are harder to rip out, should that be necessary).

Where to start and end? For seams that go to an edge, sew a few stitches past the end of the s.a. line. For internal seams, sew 2 or 3 small stitches past the seam line that crosses the one you are doing.
Now you have to trim the previous pieces. (Hang with me.) You need to fold the stabilizer back toward the lower-numbered piece. Say what? OK, if you just sewed piece 2 to piece 1, then fold back on the seam line toward piece 1. If you just sewed piece 17 to piece 16, fold toward 16. Get it? You should then see the excess of the previous piece(s) you have sewn. The picture below shows this later in the process to be more effective.

Then trim away the excess. Most books say to leave 1/4"; I find 1/8: works just as well (and helps to eliminate some bulk; remember, there may be many pieces of fabric overlapping in a small area). BUT: before you trim, take note: if you are about to trim any part of the stabilizer, STOP! You should NEVER be cutting paper!!!! If you see a large piece of the fabric you just sewed on, STOP: it either flipped over after you sewed it or you sewed it on wrong. Figure out which and adjust as necessary.
Next, working on the fabric side of the stabilizer, flip the piece you just sewed on its seam line and press into place. Make sure it lies flat and is pressed on the seam line. I recommend that you do NOT spray or use steam when pressing. The water may make the pencil line bleed and stain your fabric (especially light-colored ones).

Then of course you will turn the whole thing over in preparation for sewing on the next piece. It should look like this:

IMPORTANT: After you sew each piece, hold the stabilizer up to the light and make sure a) there are no holes / gaps. In other words, did you go from piece 5 to piece 7 and leave out 6? And, b) make sure the last piece you just sewed (and, really, all the pieces) cover the entire area they are supposed to cover. Pieces on the edges should go beyond the s.a. line.
Continue in this fashion, adding each piece in order. Here is a photo after piece 4 has been added and 5 is ready to be sewn (piece 5 is not visible, but trust me, it is there!):

Here is the spoke with all 18 pieces sewn and pressed (prior to trimming), from the back.....

...and from the front:

Here is the final spoke after trimming, from the back....

...and from the front:

Now you have to tear off the stabilizer pieces. Start at one edge (or maybe several. Often I pull the paper off in the reverse order of how they were sewed on; the last piece sewn will always be on an edge). Fold the paper back along a seam line, crease it, and then it should tear off fairly easily. Your seam ripper and a tweezers help to get the little bits that may stick where several seams meet.

Finally, here are two finished spokes:
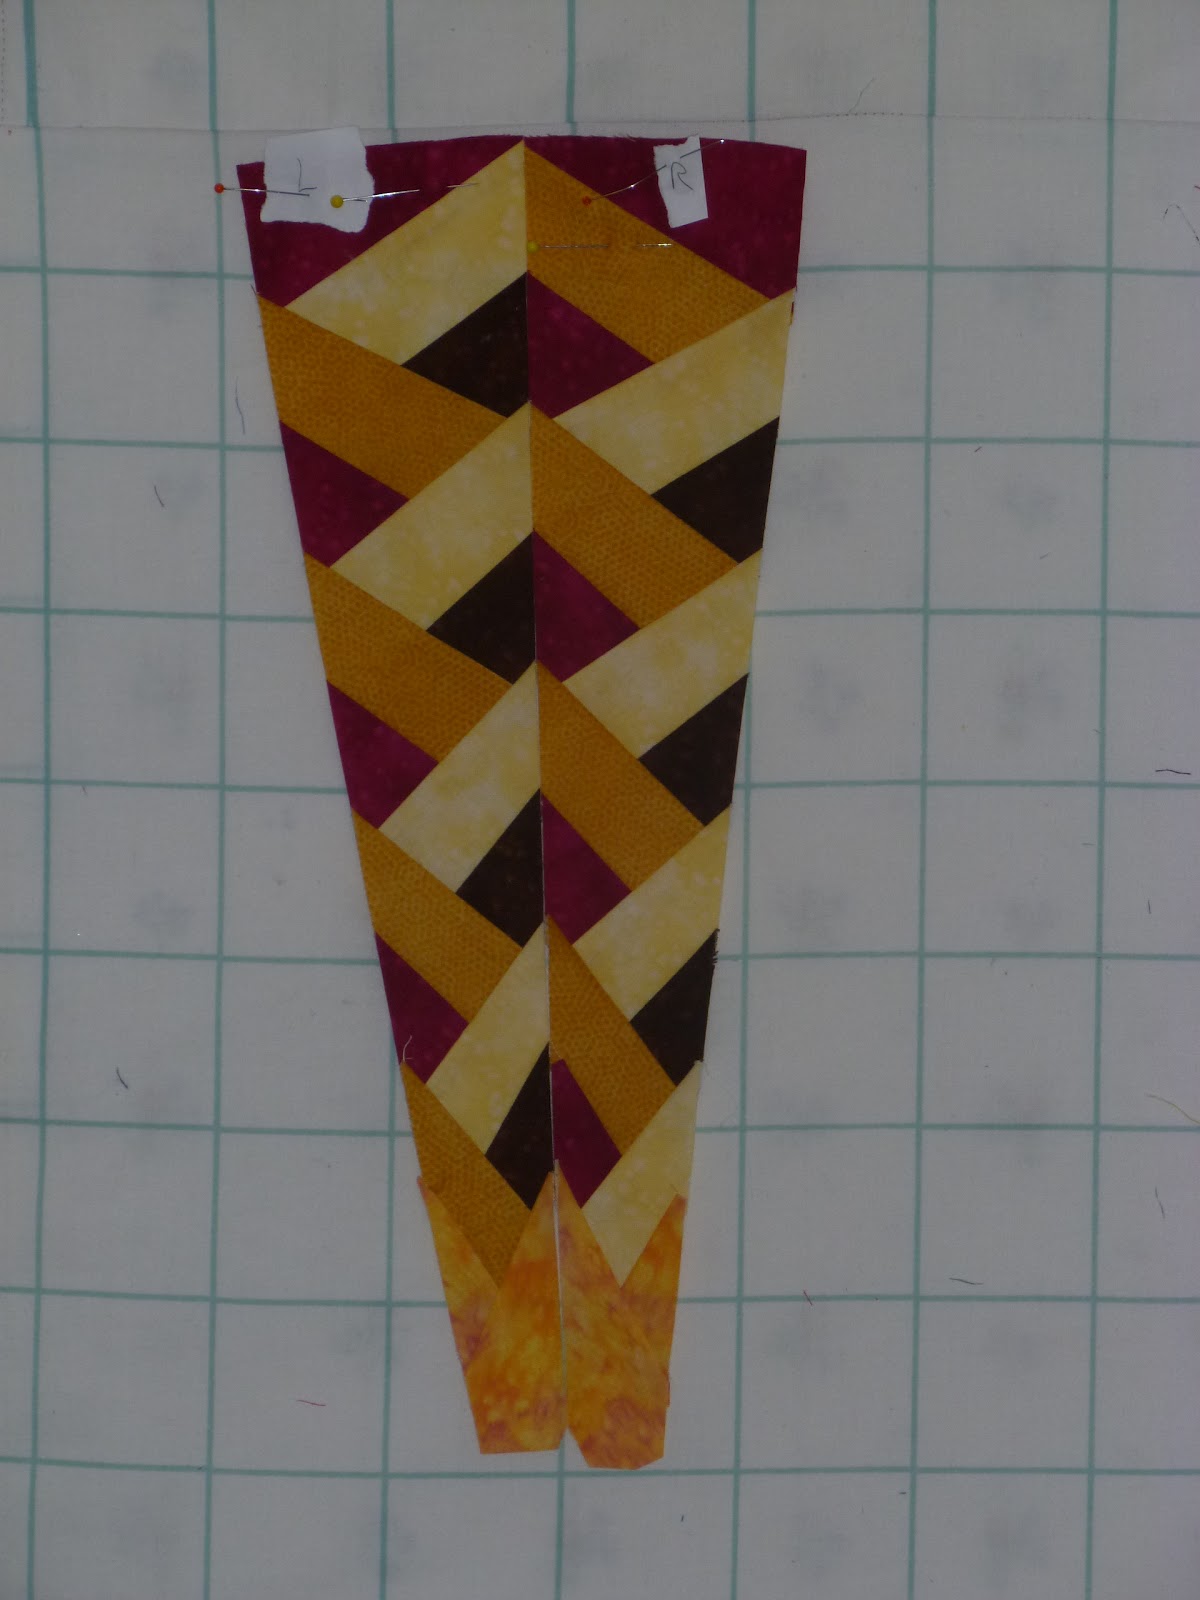
Happy paper piecing!

hi
ReplyDeletejust wondering why remove the light weight stabilizer if it keeps all those seams flat and going in the seam direction
Heather Greig
Hi. where can I obtain
ReplyDeletethe Venice Rose paper piece pattern please
It's a pattern by Norah McMeeking at Bella Bella quilts.
Delete